How this powerful, shadow-less candle signals undisputed control by either buyers or sellers.
There is nothing new on Wall Street or in stock speculation. What has happened in the past will happen again and again.
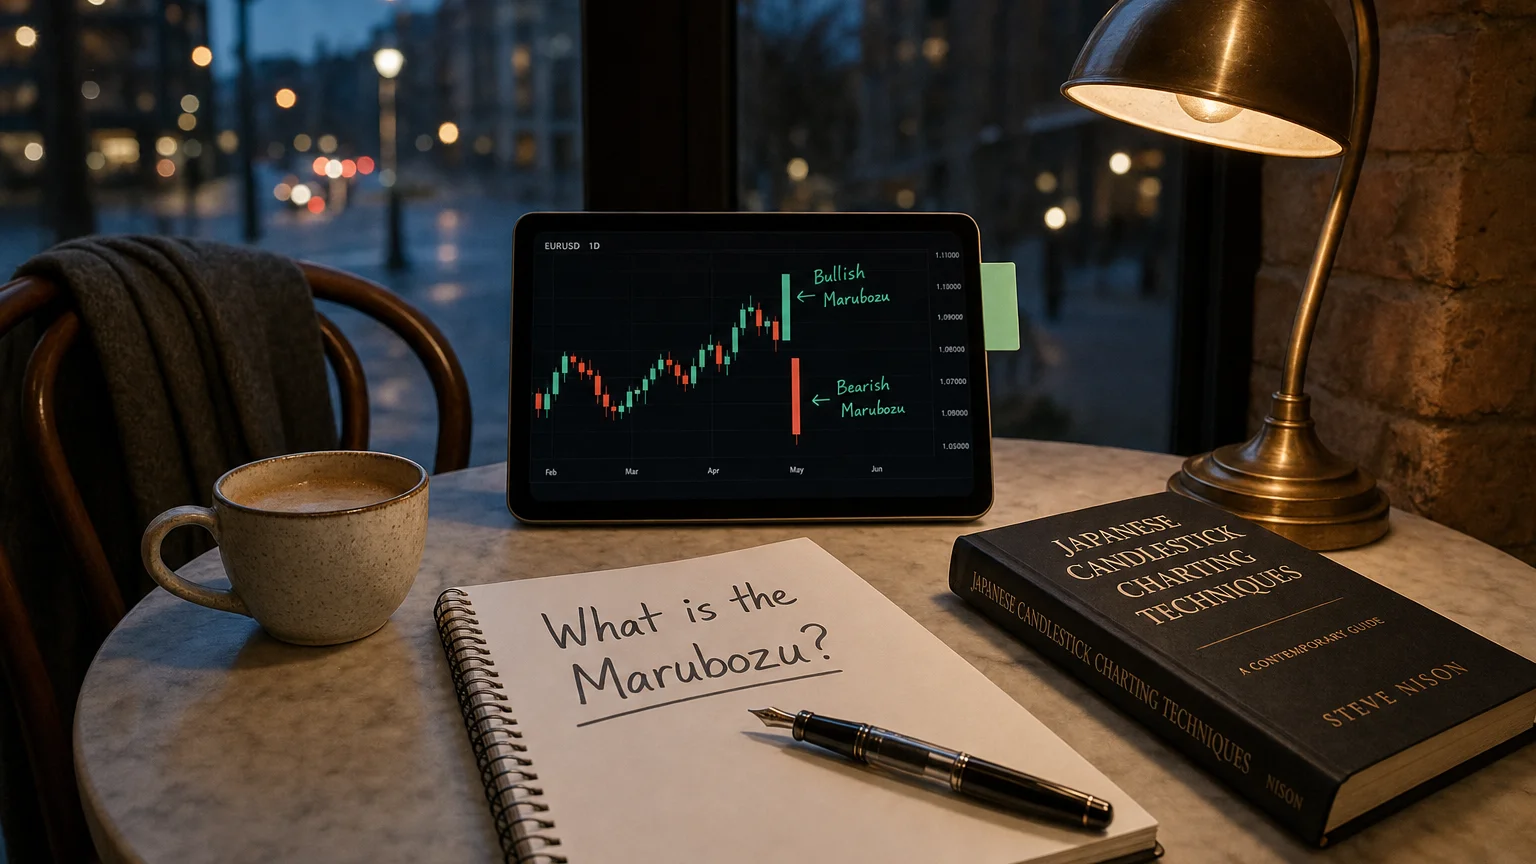
“Marubozu” (丸坊主 = “shaved head” in Japanese) is a **single-candle momentum bar with a full-length real body and virtually no upper or lower shadows.
-
Bullish Marubozu: open ≈ low, close ≈ high → buyers in undisputed control.
-
Bearish Marubozu: open ≈ high, close ≈ low → sellers dominate from bell-to-bell.
Variants sometimes recognised:
-
Opening Marubozu – small shadow only at the close side.
-
Closing Marubozu – small shadow only at the open side.
Both still signal strong one-sided conviction, but the “true” (shadow-less) Marubozu is the most potent.
Identification Checklist
| Rule | Specification | Why it matters |
|---|---|---|
| Body length | ≥ 1.5–2 × the 20-bar average true body | Flags an unusually forceful session |
| Shadows | Each wick ≤ 2–3 % of total range | Confirms nonstop directional drive |
| Colour | Green/white = bullish, red/black = bearish | Encodes winner of the session |
| Context | Works best with prevailing trend | Momentum candles tend to extend |
Market Psychology
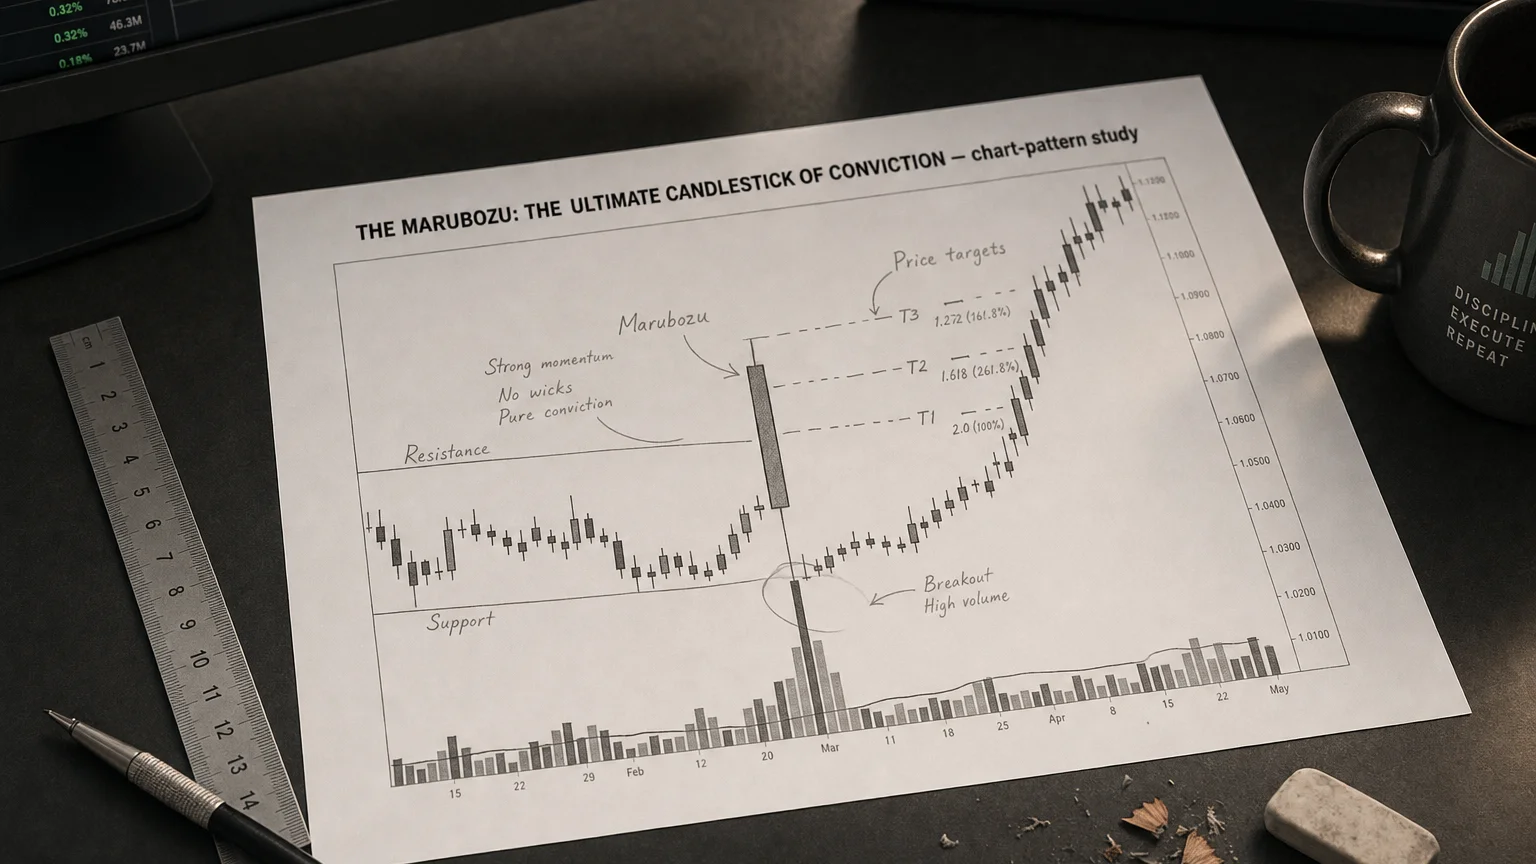
A Marubozu shows a day (or bar) in which price never meaningfully retraced—either bid up from the open to close or offered down relentlessly. That dominance often forces the other side to capitulate in the following bars, fuelling continuation; alternatively, if it prints as a hard climax into major structure, it can become an exhaustion spike that flips the script.
Trading Playbook
| Element | Bullish Marubozu | Bearish Marubozu |
|---|---|---|
| Aggressive entry | Buy on close or next-bar break of high | Sell/short on close or break of low |
| Conservative entry | Wait for a confirming close above high with volume ≥ 1.2 × avg | Wait for close below low with volume confirm |
| Initial stop | Below candle low (or 1× ATR) | Above candle high (or 1× ATR) |
| Targets | 1.5–3 R or nearest supply / fib cluster | Mirror for shorts |
| Time filter | If price hasn’t moved ≥ 0.5 R in 3–4 bars, de-risk | Same |
Pairing the pattern with a 20-EMA slope or higher-time-frame trend filter lifts expectancy in independent tests.
Statistical Tendencies
| Study (Bulkowski data*) | Continuation bias | Frequency rank** | 10-day performance rank** |
|---|---|---|---|
| Long White Day | 58 % move higher | 10 / 103 | 53 / 103 |
| Long Black Day | 53 % move lower | 9 / 103 | 19 / 103 |
*Long White/Black Day is Bulkowski’s proxy for Marubozu (shadow ≤ 25 % of range).
**1 = most common / strongest.
Take-away: raw edge is modest but real; confirmation, volume, and trend alignment significantly improve outcomes.
Strengths & Limitations
Strengths
-
Extremely easy to spot or code—one candle, objective rules.
-
Provides crisp invalidation (stops just outside candle extremes).
-
High frequency compared to exotic multi-bar patterns.
Limits & Pitfalls
-
Edge fades fast; if follow-through stalls, mean-reversion bites.
-
Can be an exhaustion bar at climactic news levels—read the backdrop.
-
Works best as a continuation tool; standalone reversal calls are low-probability.
Quick Visual Cheat-Sheet
Bullish Marubozu Bearish Marubozu
open = low open = high
████████████ ████████████
close = high close = low
(no wicks) (no wicks)
Trade in the candle’s direction after a volume-backed break of its extreme,
keep stops just beyond the opposite side.
Summary
The Marubozu is the chart’s loudest declaration of one-sided conviction—a big, shadow-less block that tells you bulls (or bears) owned every tick of the session. Use it primarily as a momentum continuation trigger: wait for a confirming push beyond the candle’s extreme on healthy volume, tuck your stop just outside the opposite end, and aim for at least 1.5 – 3 R before tightening the leash. Respect context—especially nearby support/resistance and news catalysts—to avoid buying the very top (or shorting the bottom). Nail those checks, and the Marubozu can be a simple yet powerful tool in your price-action arsenal. Rock on and manage that risk!
Q · 01What is The Marubozu?+